If you are a new website designer or if you have recently established a new startup organization for your business, you must be wondering how to give your clients their own space for them to view their invoices, receipts, agreements, quotes, reports or to send out any information to them. If yes, then you came to the right spot.
We will explain you how you create a client portal and integrate it with your website for free.
Download the best free client portal plugin: WP Customer Area
WP customer area is the best free client portal plugin out there that will give you the ability to provide access to your clients. There are multiple add-ons that you can purchase with this plugin from their official website. However, here we will only talk about the features offered by the free version of the plugin.
Step 1. Download and Activate the Plugin
To begin the process, download and activate WP customer area plugin. Link to the plugin can be found here. Once downloaded, you’ll have the two sections for WP customer area in your dashboard. One under settings and one in the left hand side menu. As soon as you activate the plugin, you’ll reach the following page:
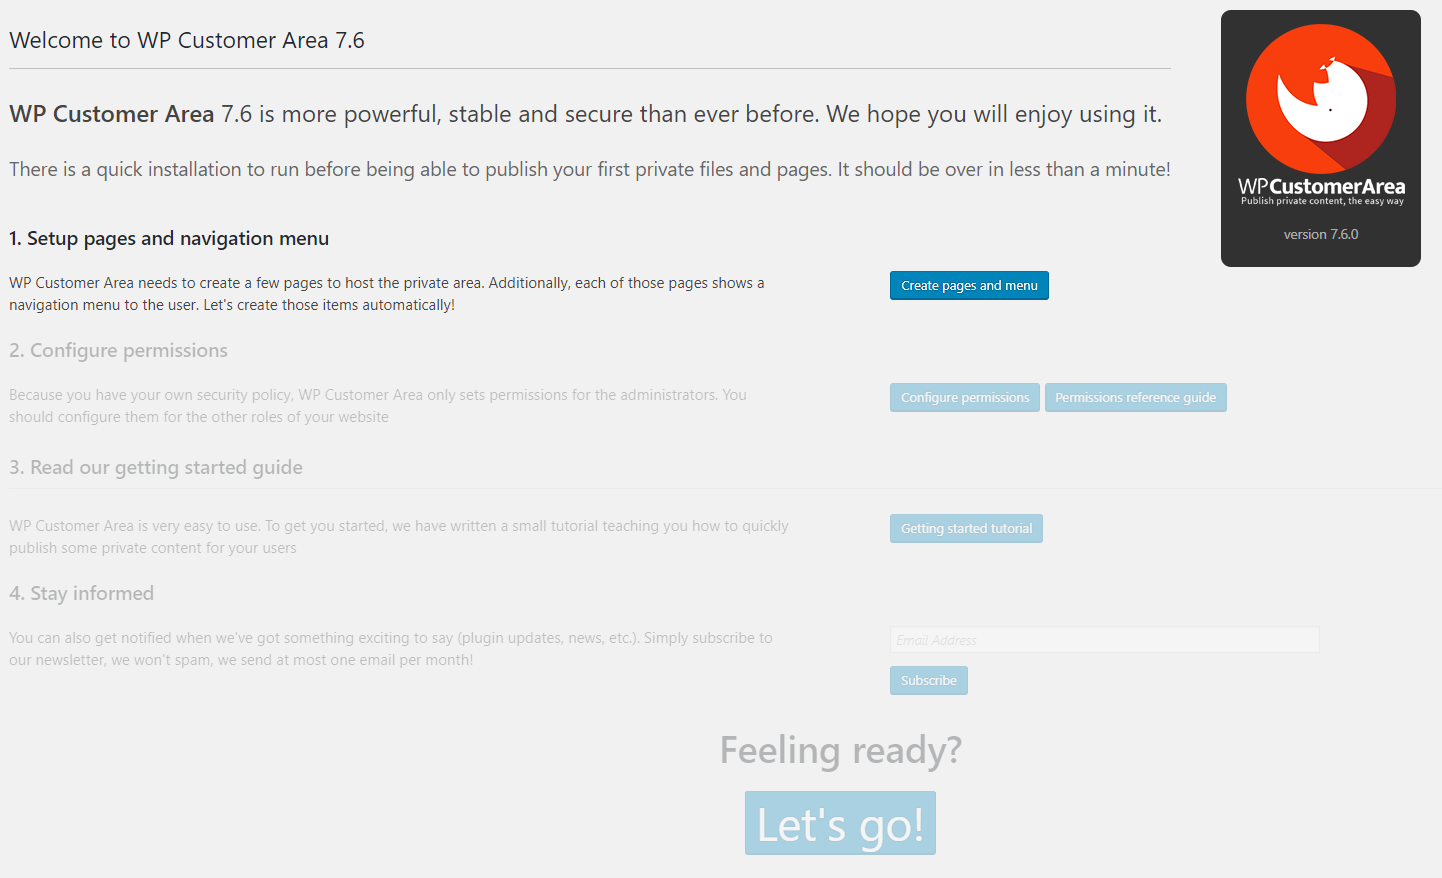
Step 2. Create Pages and Configure Permissions
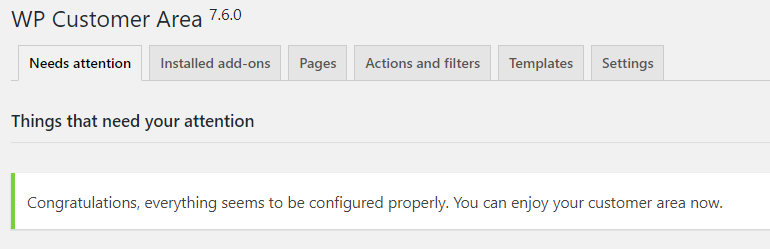
Click on “Create pages and menu”. This will create all the customer account pages and menu to be viewed by the customer. Then click on “configure Permissions”. This will open your website in a new tab. click on “Fix Potential Issues”. It’ll bring you to this page:
Pro Tip: If you are using Woocommerce, then the plugin Edit account page will conflict with the “Edit Account” page of WP Customer Area. So either you need to change the permalinks or disable Woocommerce plugin and create “Edit Account” page again.
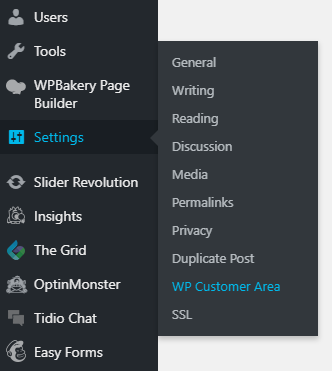
Step 3. Configure Settings
Go to Settings – WP Customer Area
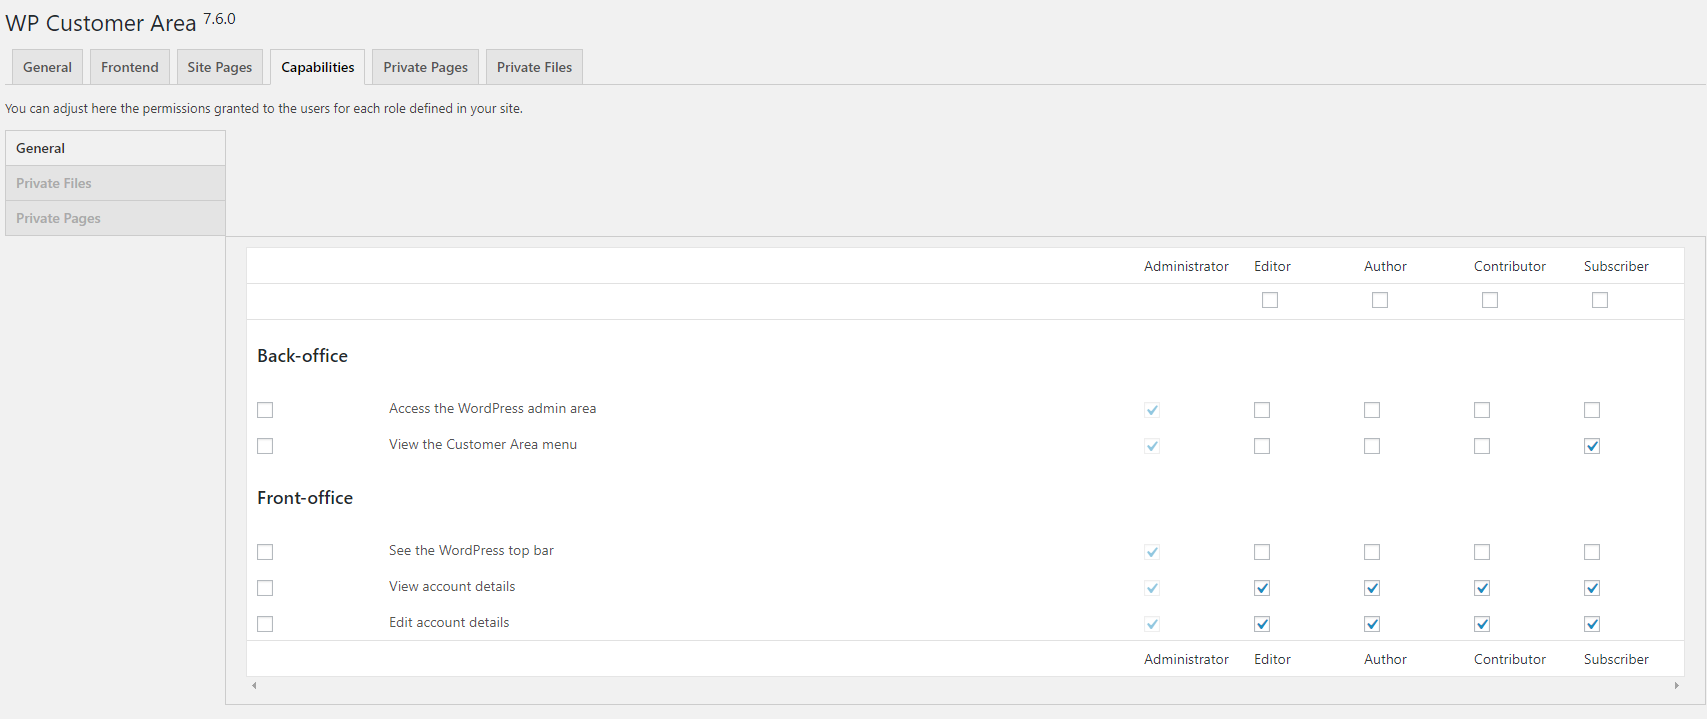
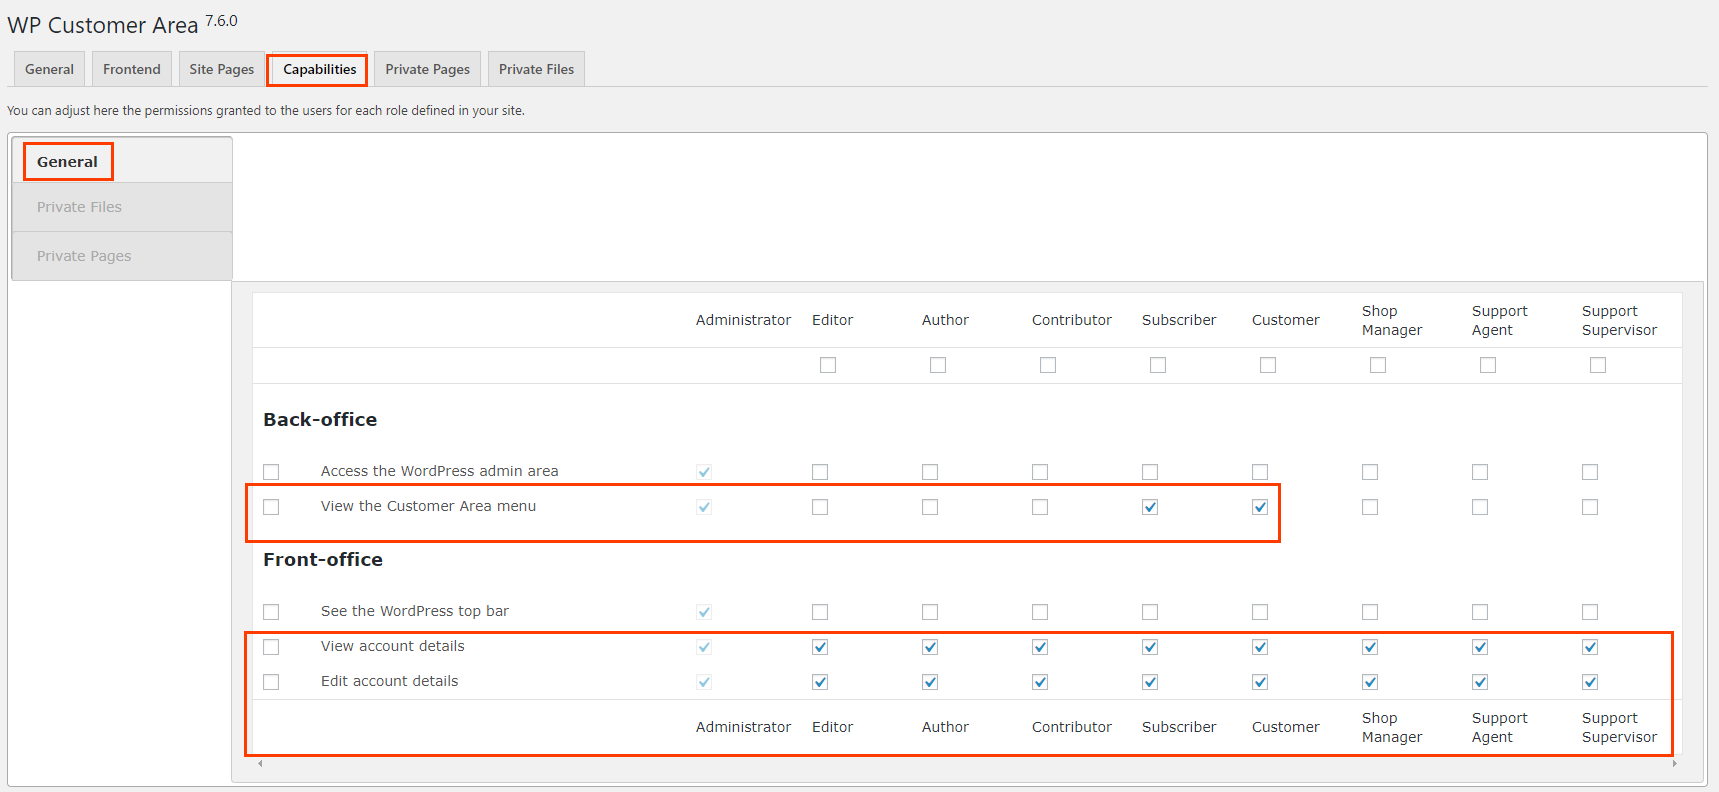
Leave all the settings as it is in “General”, “Frontend” and “Site Pages” tabs and click on “Capabilities” tab. Provide the capabilities to the users as below. Based on your theme, your “Capabilities” page may look like either of the two screenshots below:
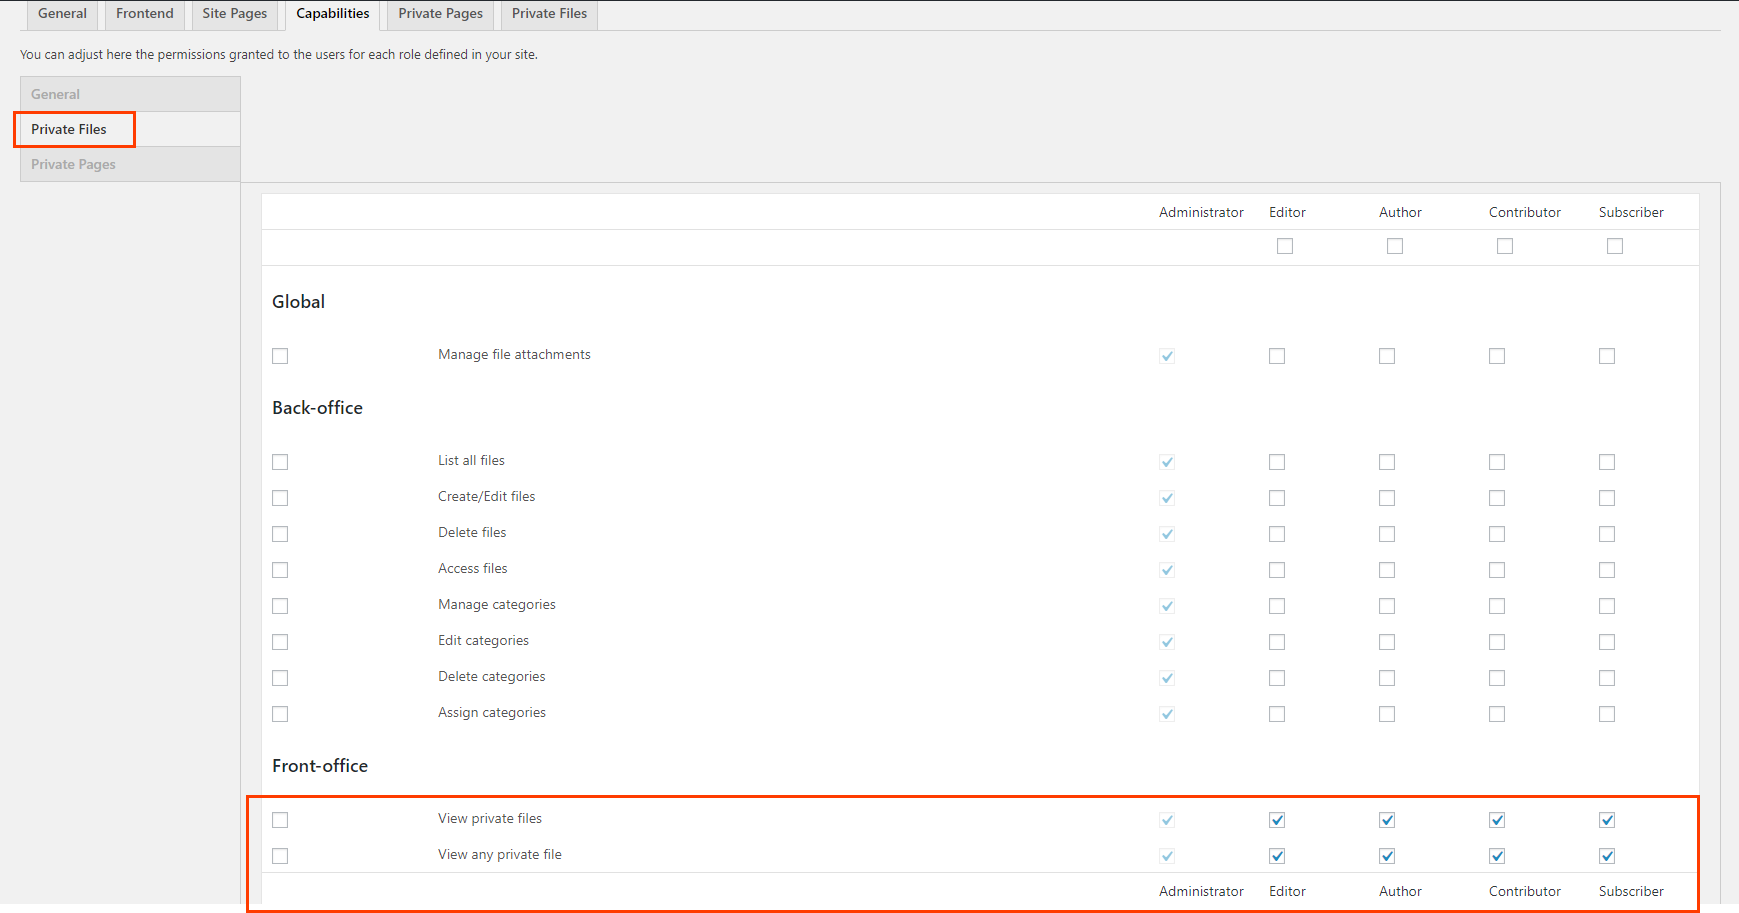
Go to “Private Files” and provide the permissions to the users as shown below:
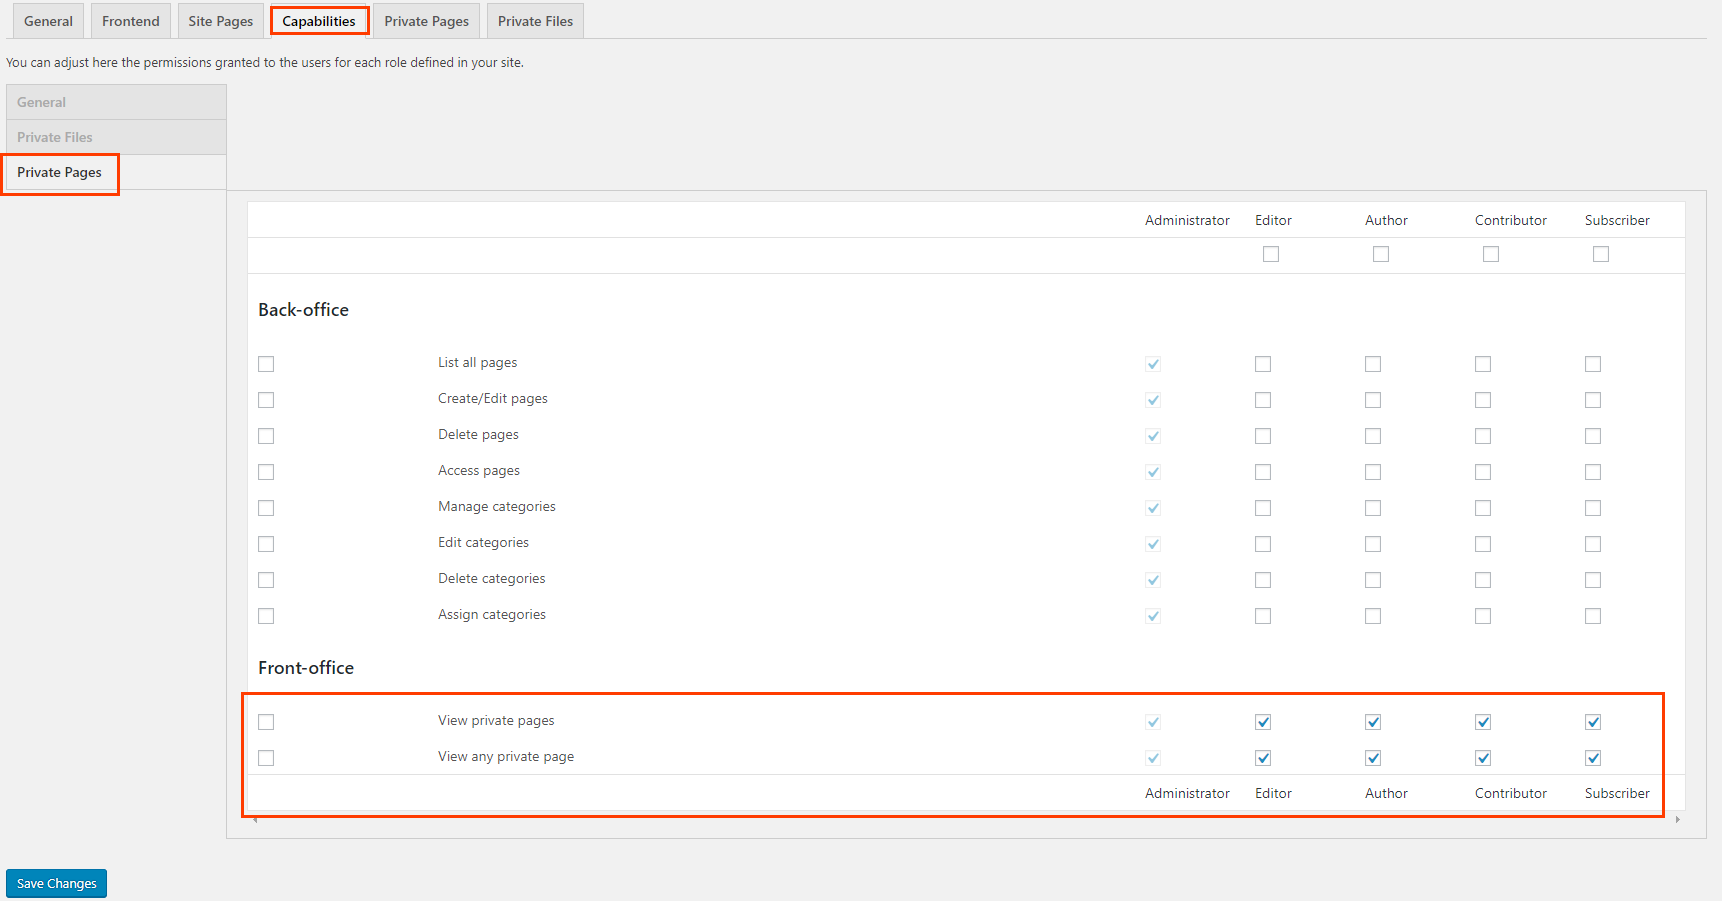
Go to “Private Pages” and provide the permissions to the users as shown below:
Step 4. Secure Files
Go to “Private Files” tab. You may want to secure your files storage as it’s not good to leave them in the default location. Your “Private Files” tab may look something like this:
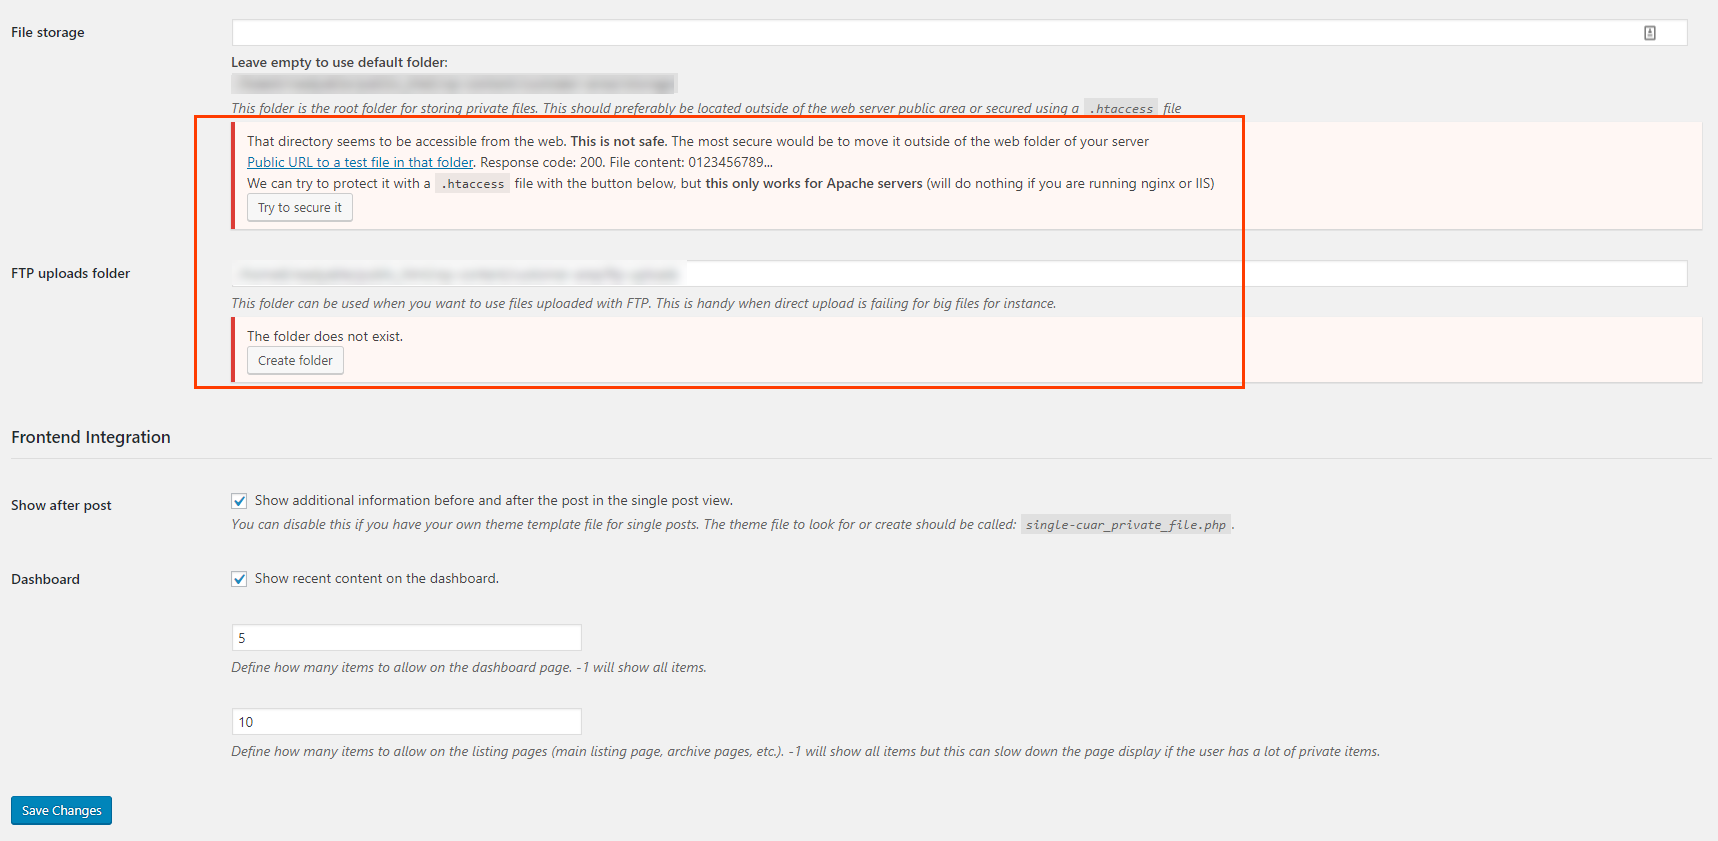
Click on “Try to Secure It” and hit save changes. Then click on “Create Folder” and save changes. That should fix all the security issues.
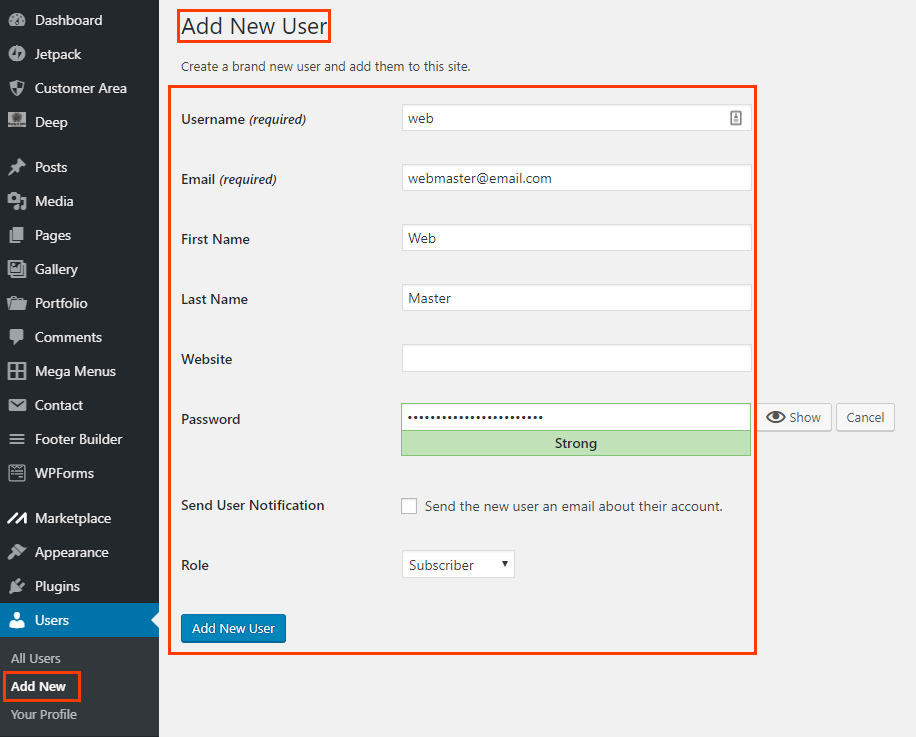
Step 5. Add New Users
Add a new user to the website with “Subscriber” role. This user will be your client’s information.
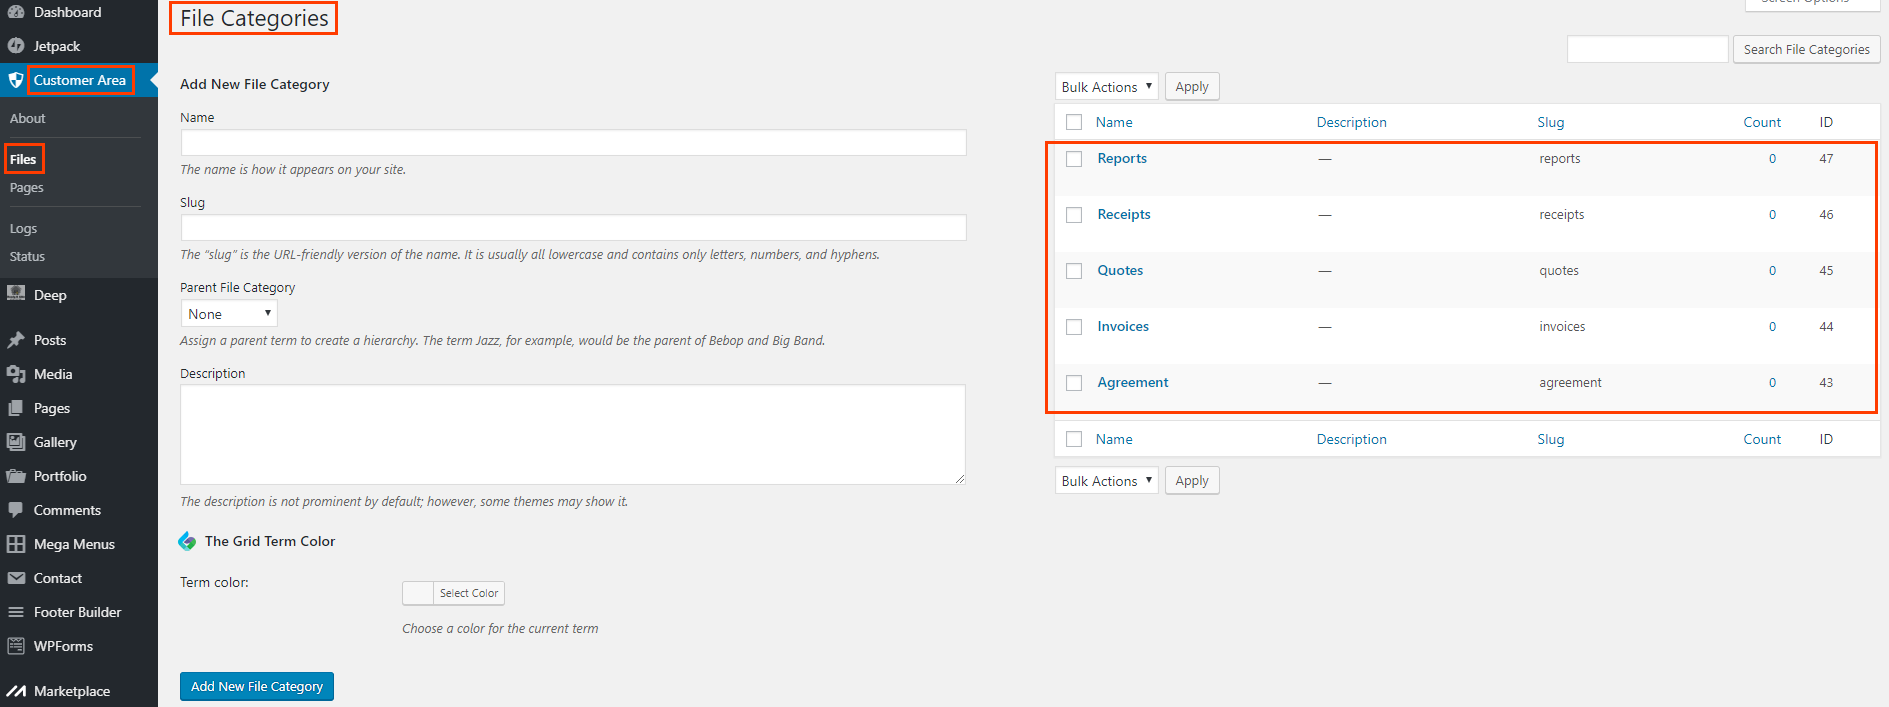
Step 6. Add File Categories
Go to WP customer area – Files – Manage File Categories section and add the following file categories:
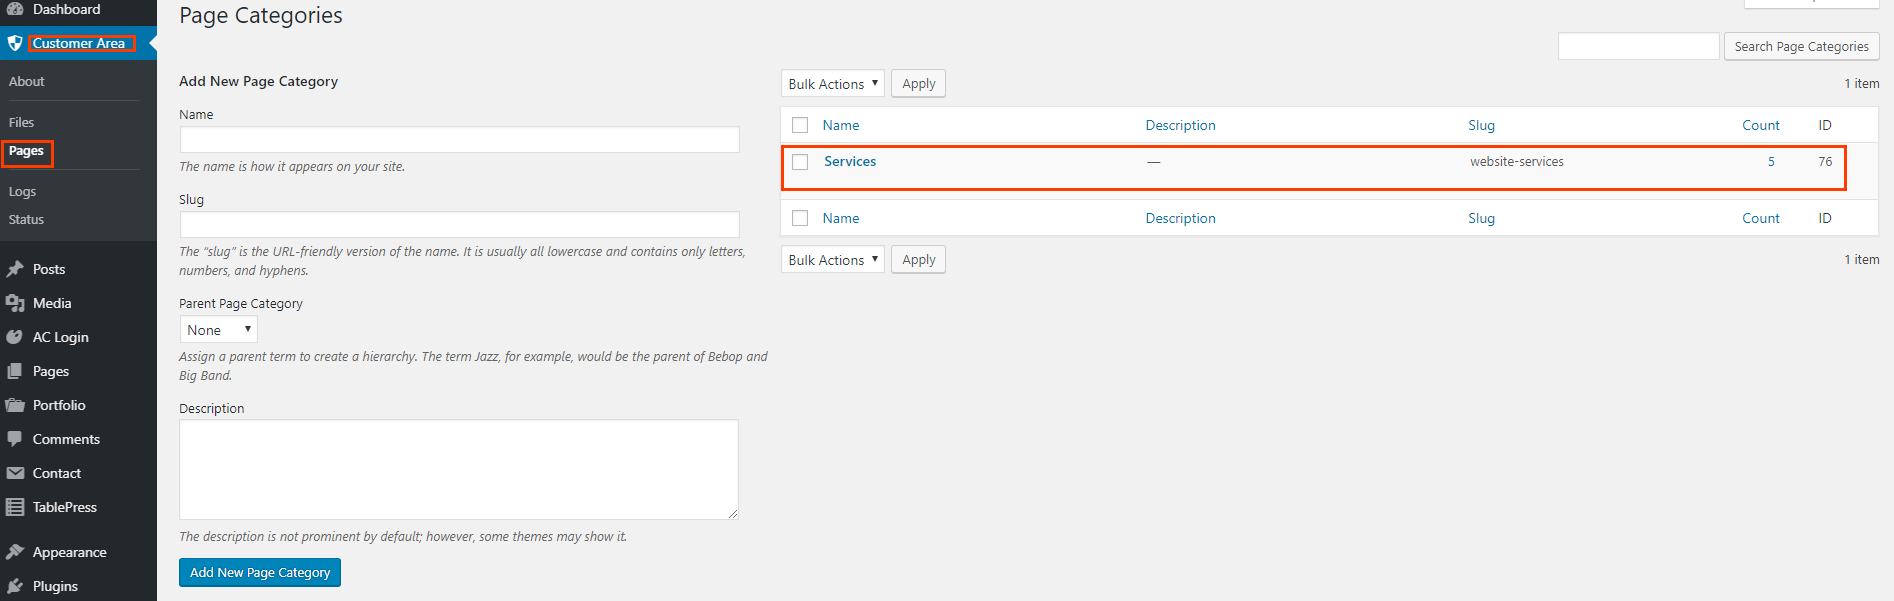
Step 7. Add Page Categories
Go to WP customer area – Pages – Manage Page Categories section and add the following file categories:
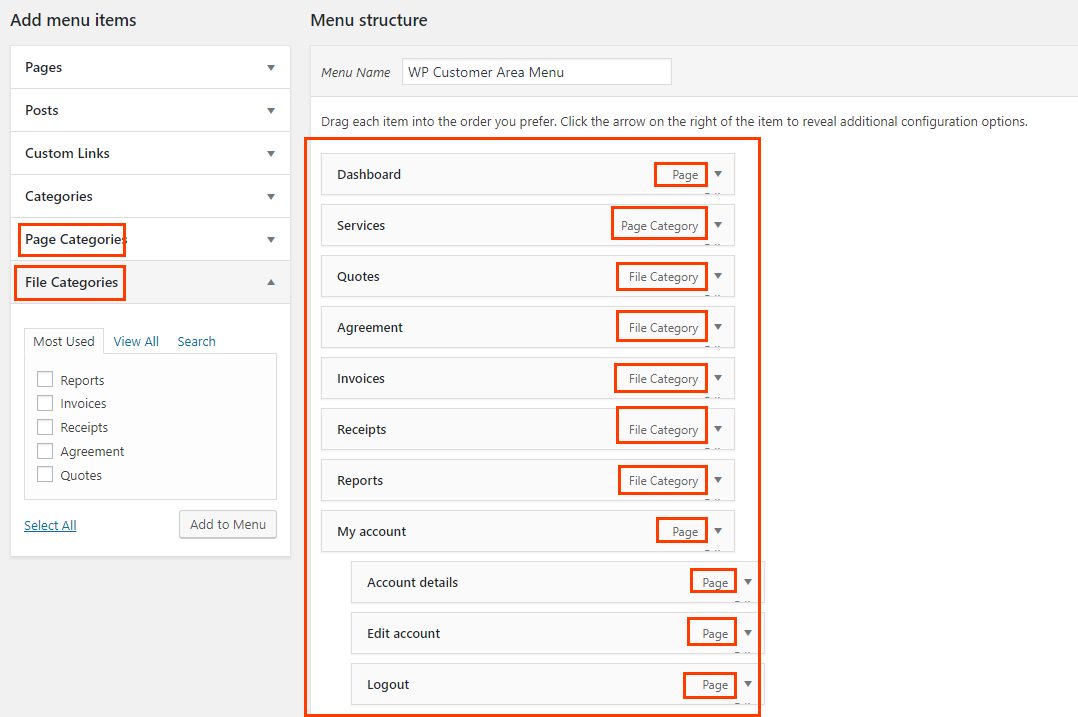
Step 8. Setup Menu
Now that all the settings are saved, go to WP Customer Area menu.
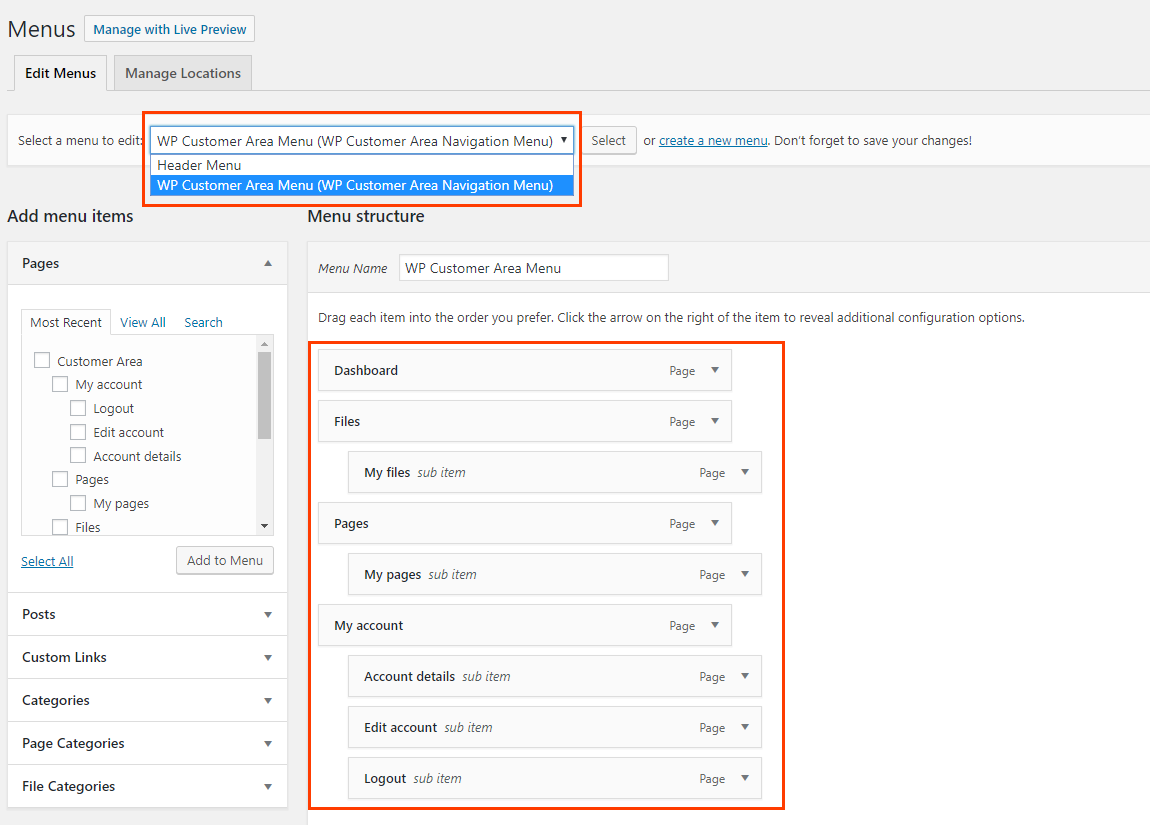
Arrange the menu tabs as shown below. If it is a “file category”, choose from “file category” section. If it is “page category”, choose it from “page category” section on the left hand side menu.
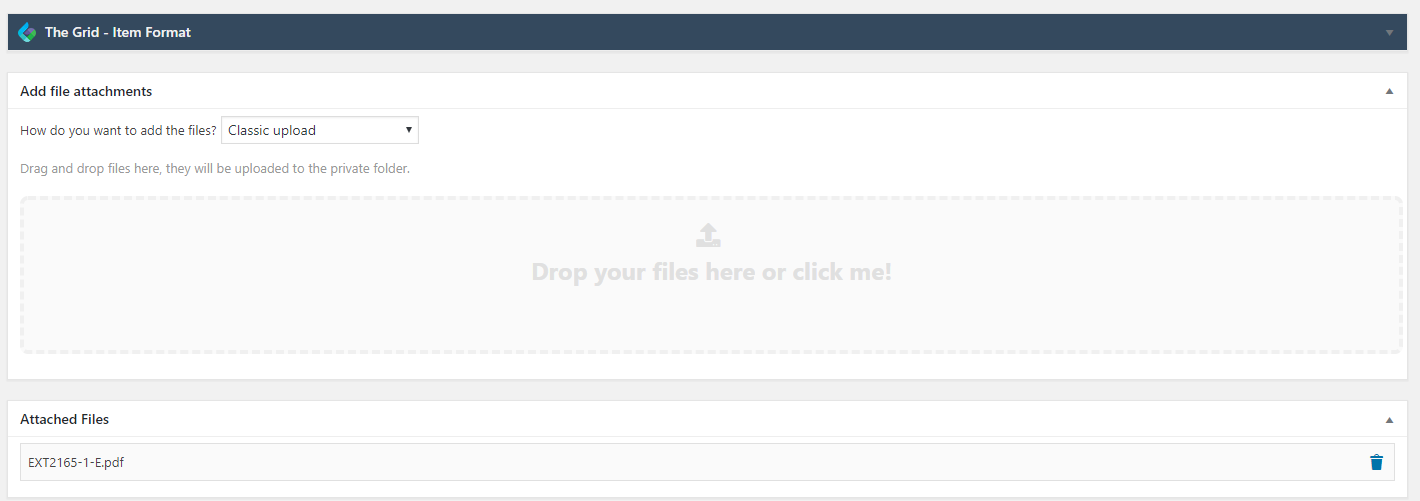
Step 9. Start adding files and pages
Go to Customer Area – Files and click on Add New. You will have the option to add the content similar to any other blog post. Give a title, from the right hand side “File Categories”, choose the appropriate option, under details, select the user that the post belongs to. Under “Add File Attachments” section, click and add the file that you want to upload. You will have the option to publish the post immediately or if you want to schedule it to be posted on a future date (similar to any other blog post). Once done, publish the document.

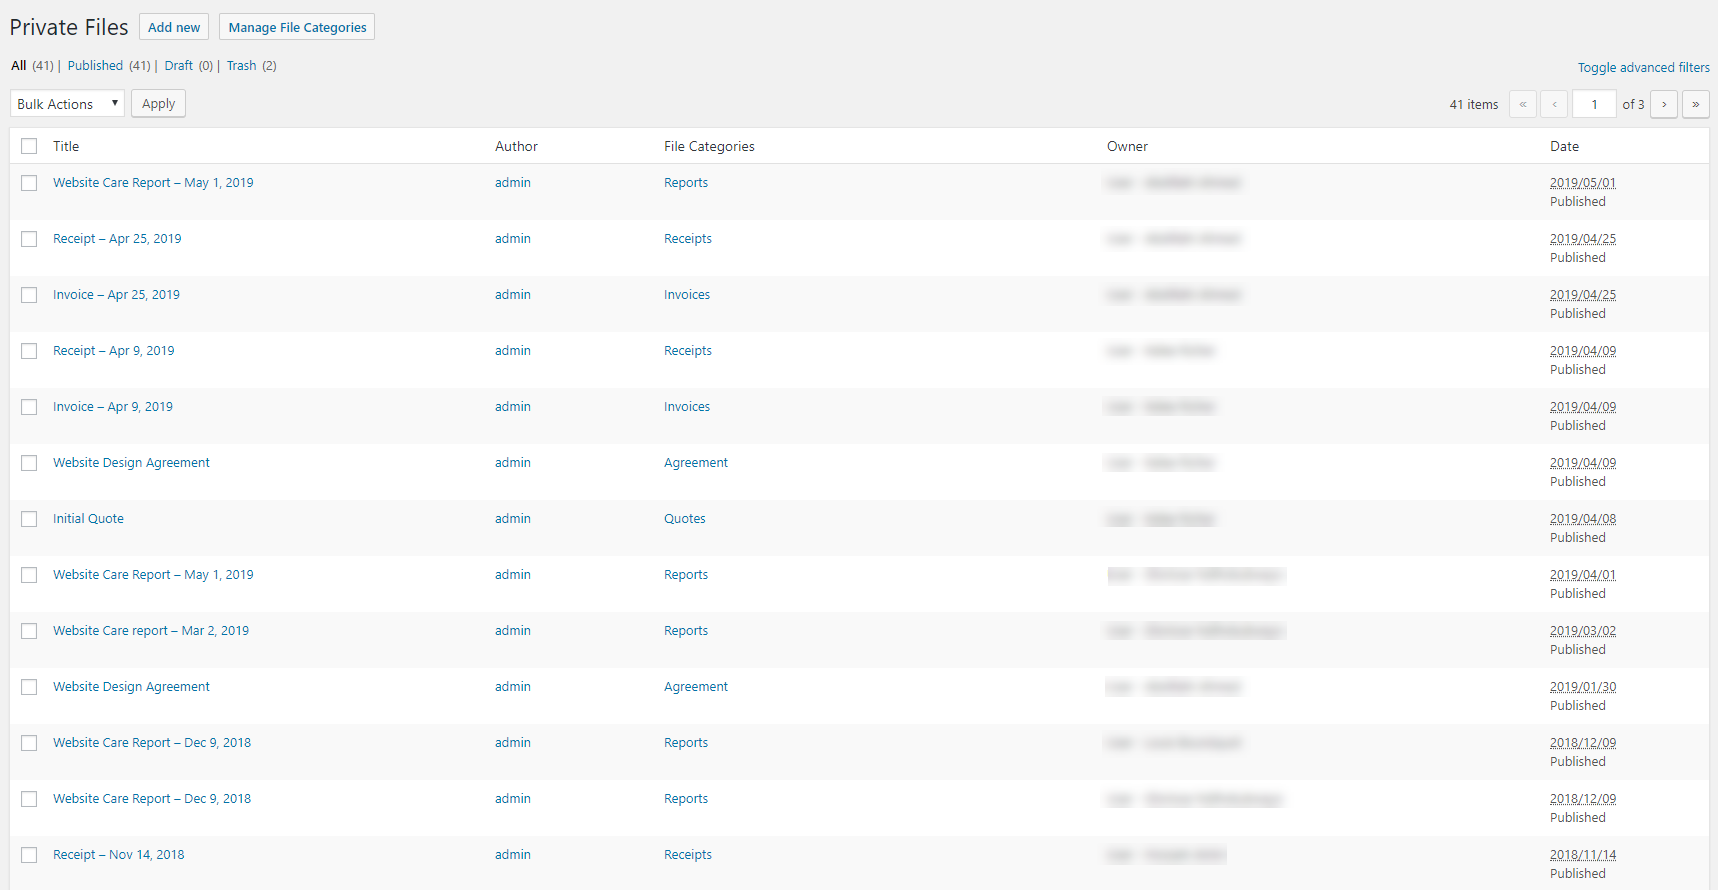
Repeat the same steps for invoices, receipts, reports, and under “Pages” services as well.
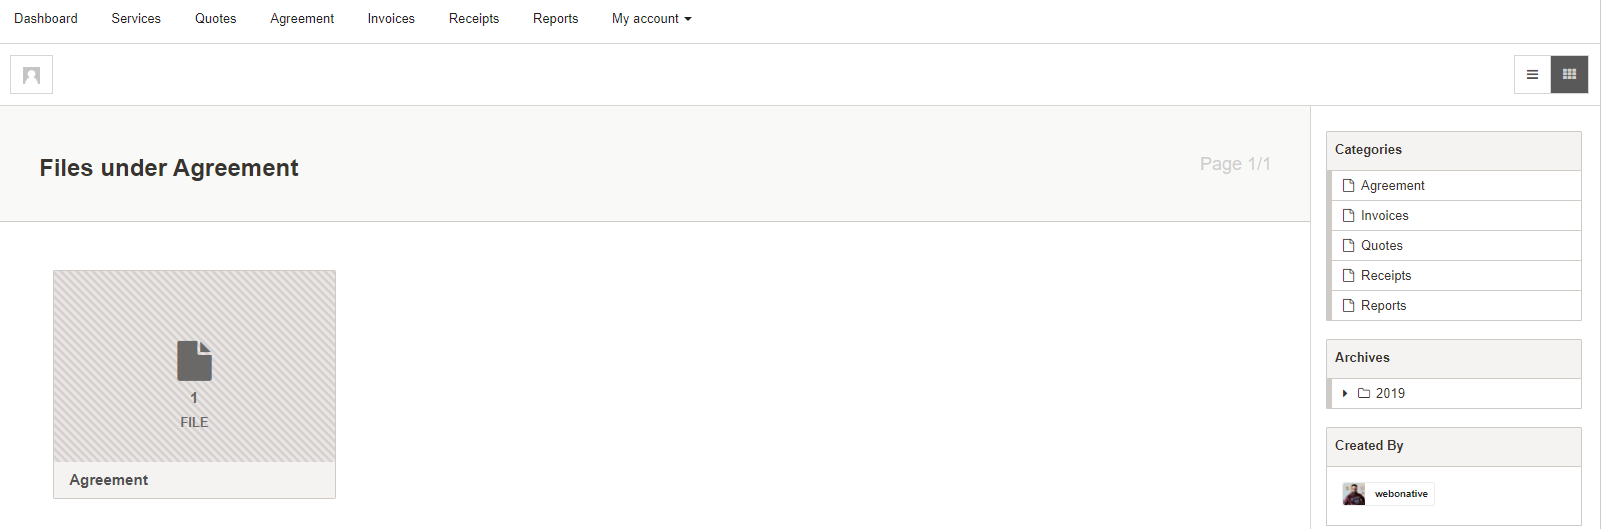
Step 10. Make sure to login to customer’s environment to check if the correct file has been assigned to correct user or not
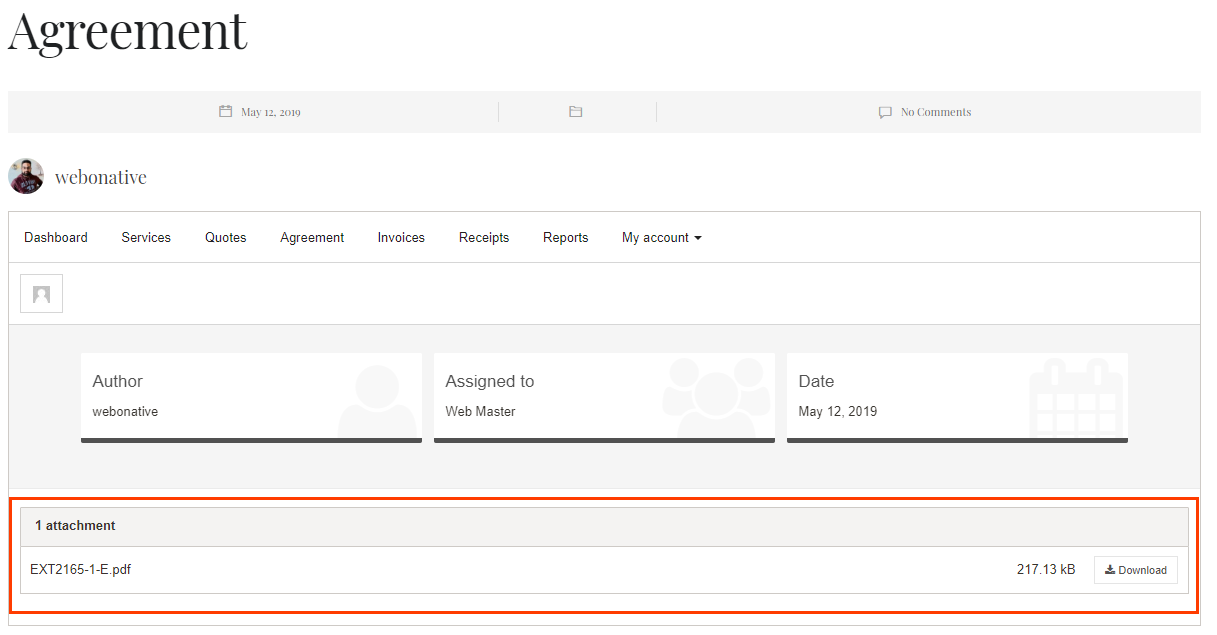
Go to your regular WordPress Admin Login page and login as customer. Below is what your customer would see when they login:
Once they click on the file, they will have the option to download it:
They can also change their own passwords and general information by editing the account details under “My Account” page.

We hope this article was useful to you and we can’t wait to hear your feedback and comments on this. Feel free to comment below in case of any questions or to provide feedback.
